Micro bonding is a revolutionary installation technique for hair extensions. Stylists, if you aren’t yet using micro bonds, read on!
In this blog post, we’ll show you how to use this approach when installing two of our most popular professional methods, Kera-Link extensions and Tape-In extensions.
What is micro bonding?
Micro bonding involves cutting down extension strands so that you can install them on smaller sections of hair. This technique allows for precision placement, less weight and more flexibility.
When should I use micro bonding?
Micro bonding works especially well for clients with thin, fine and fragile hair. It’s a great technique for any time you need to install extensions in the crown area and near the hairline. This technique provides delicate coverage for hair thinning due to aging, illness, stress, hormonal changes, or other hair challenges.
Extensions are great for volume and length, but they also provide a variety of custom solutions. Micro bonding with shades that are lighter or darker than your base color can give the look of highlights and lowlights without damage or commitment. It can also create an illusion of greater hair density because of the added dimension and contrast of color.
Maybe you have a new client with a former haircut that didn’t go quite as planned. Or your client could be feeling self-conscious about a patchy, thinning or bald area, or need to add fullness and density to the front and sides of their hair.
Micro bonding gives you the freedom to solve common hair challenges, help your client try new things with their hair, and feel more confident.

Installing extensions using the micro bonding technique
Matching density: For each bond, make sure that the density of the client’s natural hair matches the extension piece itself. This ensures that the extensions lay comfortably and won’t put tension on the scalp. For example, if you’re creating a very small Kera-Link bond with only 10 strands of hair, you would want the section of your client’s natural hair to also be 10 strands.

For micro tapes: When installing micro bonds with Tape-Ins, be precise in ensuring that the edges are sealed well. This helps keep the extensions securely in place. Match the tape up when you sandwich your wefts (keeping the curved edge with curved edge, and straight with straight). If you have a client with an especially sensitive scalp, you might also consider using scissors to round the top corners of any micro bonds, so that the tape lays flat and is comfortable.

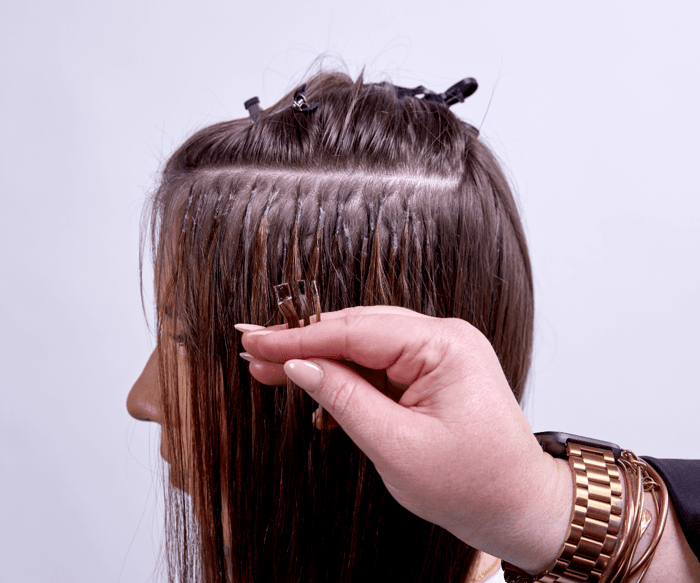
Placing your micro bonds
Because micro bonds are so small, you can place them strategically and create solutions for target areas that may have thin hair or are balding. If you use micro bonds near your client’s hairline, use this trick to create an invisible look: create a single point in the center of the strand by clipping off both points on the top left and top right of the bond. This will help the bond diffuse more at the top, making it even more subtle and easy to hide.
Remember, be sure you are matching the density of the extension strand with the same density of the client’s natural hair you will be attaching it to!
Color matching with micro bonds for an undetectable install
With micro bonds, color matching is a little bit unique. In this case, you want to focus on matching the bond color to the base of your client’s hair, near their roots. Because this technique is so often used with thinning hair, you want to keep in mind that the top of the strand will be more visible than most, and will be seen near the top of the head. To create a natural, believable and dimensional look, create custom blends of two or more colors. Another great way to create a soft blend is to use rooted extensions or Ombre extensions.
Two great methods: Kera-Link and Tape-In extensions
Kera-Link extensions, also known as Fusion extensions, are our longest-lasting pro method.They are a strand-based method which means your client will get 360-degree hair movement once they’re installed. With Kera-Links in, you can wear your hair up or down and the attachment points won’t show. These extensions come with pre-tipped keratin bonds and are attached using a melting connector. Kera-Links last for 12-16 weeks.
Tape-In hair extensions are the fastest-installing method and are made with medical-grade adhesive. They’re lightweight, comfortable and non-damaging. They require no tools to install. Tape-Ins last for 4-8 weeks and can be used 1-3 times with Replacement Tape.
Tools You’ll Need for Installation
For Kera-Link micro bonds, use Keratin Bond Cutters to cut them in half, in thirds or in quarters. Then use the Melting Connector to fuse the extensions to the natural hair. Also keep Protector Disks on hand to protect the natural hair from keratin bond residue and Rebonds so that you can adjust placement of the bonds if needed.
For Tape-In micro bonds, use Donna Bella Stork Shears to cut them in half or in thirds. Be sure to install them carefully without touching the adhesive on the tape.
A few other tools will help make your installs easy and efficient. Velcro Hair Grippers gently hold natural hair flyaways out of place so that your bonds and rows are clean. The Quick Pick Hair Parter also saves time by making hair parting easy– just wear it on your finger for easier sectioning.
For more information on stylist tools, visit our hair extension tools and accessories page.
Methods designed for more than just length
Using these tips will help you customize your client's installation based on whatever hair challenges they face. Our goal is to help you feel confident in using the micro bonding technique for your clients, empowering you to help them with any area that they are self-conscious about.
Every person is unique, and so is their hair. Our goal is to help you identify and master the methods that will work best for your clients, so they have the confidence to feel beautiful and conquer their day.
Need more help?
Our team is happy to help you determine which method, length and color you’ll need to create the look you want to achieve for your client. For more information on this process, you can read our blog post: Which extension method is right for you? You can also check out our page on how to Color Match or contact us with questions. We can’t wait to see what beautiful transformations you achieve!