What are Tape-In extensions?
Tape-in extensions are popular, effective, and well-loved by professional stylists and end-users around the world. They offer a fast and easy installation, plus incredible length, volume, and a seamless blend to natural hair. Each weft is attached using medical-grade adhesive.

Anatomy of Tape-In Extensions
- 1.5-inch wide weft on a polyurethane template
- Attached using medical-grade adhesive
- Secure hold & lays flat for a natural look
- Available in straight, curly and wavy texture

Let’s Get Technical
Here's some technical information about how Tape-Ins work.
- Wefts come pre-taped
- No tools or heat required to install them
- Tape-In extensions are installed by a professional stylist
- They move up every 4-8 weeks
- Tape-In extensions come in 35+ popular shades
- Lengths available: 12", 14", 16", 18", and 22"
- Textures available: straight, curly and wavy

Micro Bonding with Tape-Ins
Micro bonding is a revolutionary installation technique for hair extensions. Micro bonding involves cutting down extension strands so that you can install them on smaller sections of hair. This technique allows for precision placement, less weight and more flexibility.
Wondering how it works with Tape-Ins?
Micro bonding works especially well for clients with thin, fine and fragile hair. It’s a great technique for any time you need to install extensions in the crown area and near the hairline. This technique provides delicate coverage for hair thinning due to aging, illness, stress, hormonal changes, or other hair challenges.
For micro tapes: When installing micro bonds with Tape-Ins, be precise in ensuring that the edges are sealed well. This helps keep the extensions securely in place. Match the tape up when you sandwich your wefts (keeping the curved edge with curved edge, and straight with straight). If you have a client with an especially sensitive scalp, you might also consider using scissors to round the top corners of any micro bonds, so that the tape lays flat and is comfortable.

Curious what shade would look best for your hair?
Try our Virtual Color Match tool! It's super simple: upload a selfie with your hair in natural light, then we'll show you which shades to shop for. It takes only a few minutes and helps ensure a perfect blend with your natural hair.
Take a selfie or upload one that’s already on your phone or computer.
We’ll give you 3 shades we think would look great with your natural hair.
Shop your favorite method and length.
It’s that easy!
It’s kind of like a virtual matchmaker– except no dating is required, and the (hair) love is guaranteed 😉🤍
Follow these tips for the best results from your photo.
- Use natural lighting (near a window or outside).
- Wear your hair down and pull it to the front so we can see the color from roots to tips. (No ponytails, please!)
- Position yourself in frame from the waist up with all of your hair showing.
- Wear clothing that contrasts with your hair color.
- Don’t use filters or edited photos.
Why the Virtual Color Match is revolutionizing hair extensions:
- You can use it anytime, anywhere.
- Show your stylist while you’re at the salon and agree on which extensions to buy.
- It’s easier and faster than any other color matching method.
- You’ll save time not worrying about ordering the wrong hair.

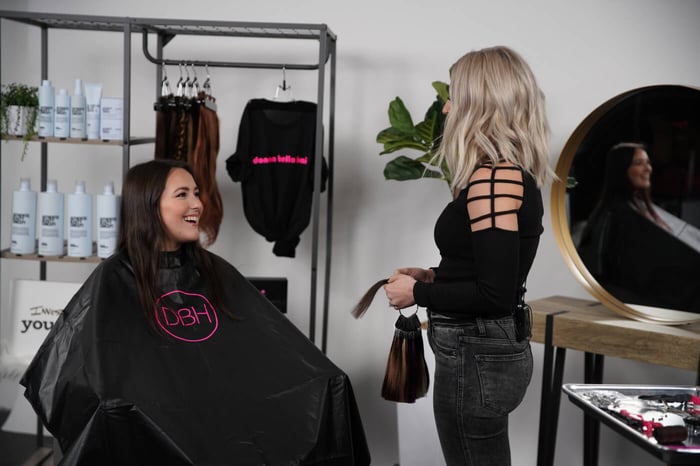
Wondering how Tape-Ins get installed in your hair?
A thin section of natural hair is sandwiched between two weft pieces and secured with medical grade adhesive. This gives you seamless, long-lasting bonds, in 60 minutes or less!
Preparing for Installation:
The process typically begins with a thorough consultation between the client and a professional stylist. During this consultation, the stylist assesses the client's natural hair, discusses the desired look, and determines the suitable length, texture, and color of the Tape-In extensions.
Sectioning and Parting:
Once the client's natural hair and extension preferences are established, the stylist proceeds to section and part the hair. Sections are created horizontally, starting from the nape of the neck and moving upward. Each section is carefully parted to expose a thin layer of natural hair where the Tape-In wefts will be attached.
Applying the Tape-In Extensions:
The Tape-In extensions come pre-taped and ready for installation. The stylist takes one weft at a time, peeling off the protective backing to reveal the medical-grade adhesive on each side. The adhesive is applied to the thin layer of natural hair, sandwiching it between two Tape-In wefts. The wefts are pressed together firmly to ensure a secure bond.
Precision and Placement:
Precision is key in Tape-In extension installation. The stylist must carefully align the wefts to create a seamless blend with the natural hair. Attention is given to ensuring that the wefts are strategically placed to hide any visible edges, creating a natural and undetectable appearance.
Bonding and Sealing:
Once the wefts are securely in place, the bonding process begins. The medical-grade adhesive creates a strong and long-lasting bond that can withstand regular washing, styling, and maintenance. It is crucial to seal the edges of the wefts meticulously to prevent any slippage over time.
Blending and Styling:
After the Tape-In extensions are installed and bonded, the stylist blends the natural hair with the extensions to create a seamless transition. This often involves cutting and shaping the extensions to match the desired style. The client can then enjoy the freedom to style their hair as they normally would, incorporating the extensions into various hairstyles.

Your Care Guide Cheat Sheet: Tape-In Maintenance 101: Do’s & Don’ts
DO:
- After install, wait 2-3 days to wash your hair.
- Brush often with an extension brush.
- Use sulfate free hair products.
- Use a heat protectant before blow drying or styling.
- Sleep with your hair in a loose braid or bun and use a silk pillowcase to minimize tangling.
DON’T:
- Don’t apply conditioner near the attachment points (this can cause slippage).
- Don't overwash. Wash 1-2 times per week and condition 2-3 times.
- Don’t use oil-based hair products near the bonds.
- Don’t blow dry your hair upside down.
- Don’t sleep with wet hair.
Want to learn more about Tape-Ins? Here are some other blog posts to check out: