How to Use Clip-In Hair Extensions
When you don’t have time for the salon, but still want a little extra oomph for your hair, Clip-In hair extensions are a perfect solution.
They are a fast, easy method to install from home– plus they give you the ultimate freedom to customize your length, color and volume.
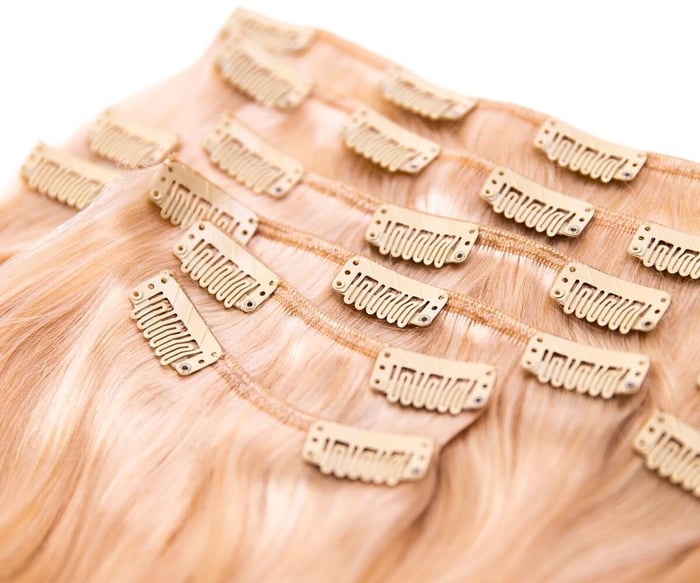
What are Clip-In Extensions?
Clip-In extensions come in sets of multiple-sized wefts of hair applied using pressure clips. They can be applied and styled in about 15-20 minutes depending on how many you use. Donna Bella Hair® Clip-Ins are made with 100% human hair and come in 3 lengths: 16", 18" and 20". They also come in two different densities: Deluxe (140 grams of hair) and Regular (120 grams of hair) so you can easily blend to your natural hair thickness.
Curious how to put in Clip-Ins? Here, we’ll guide you through a simple tutorial on how it works and then answer some commonly asked questions.
Benefits of Clip-Ins Hair Extensions
There are many reasons to love these DIY extensions.
- With no glue, heat, or chemicals, they don’t cause damage to your natural hair.
- They’re easy and fast to apply, reposition and remove.
- They boost volume and add length, giving you an instant boost of confidence, plus the freedom to style your hair in a variety of different ways.
- In the same way that your natural hair is not precisely all one length, Donna Bella Hair® Clip-In extensions are not all one length and come pre-blended at the ends– they are ready for blending as is, saving you time as you install the clips.
- They sit comfortably and securely and can be worn all day.
- You can easily remove them at the end of your day or when doing activities like swimming, spending time in the sun, or doing a sweaty workout.
- Clip-Ins are long lasting and hold up well over time. With simple maintenance and caring for your extensions consistently, you can wear them for over a year with weekly or daily use.

How to Install Clip-Ins
Change your look on-the-go with a set of Clip-In extensions. The greatest part is that you get to decide exactly where you want to place each weft, so you have total control over the length and density of your look.

Step 1: Part your hair.
After brushing your hair, section into a T-parting, letting down 1-2” of hair from the nape of your neck. For a straight, clean line, use a Quick Pick Hair Parter. Use a hair clip to hold your hair out of the way.
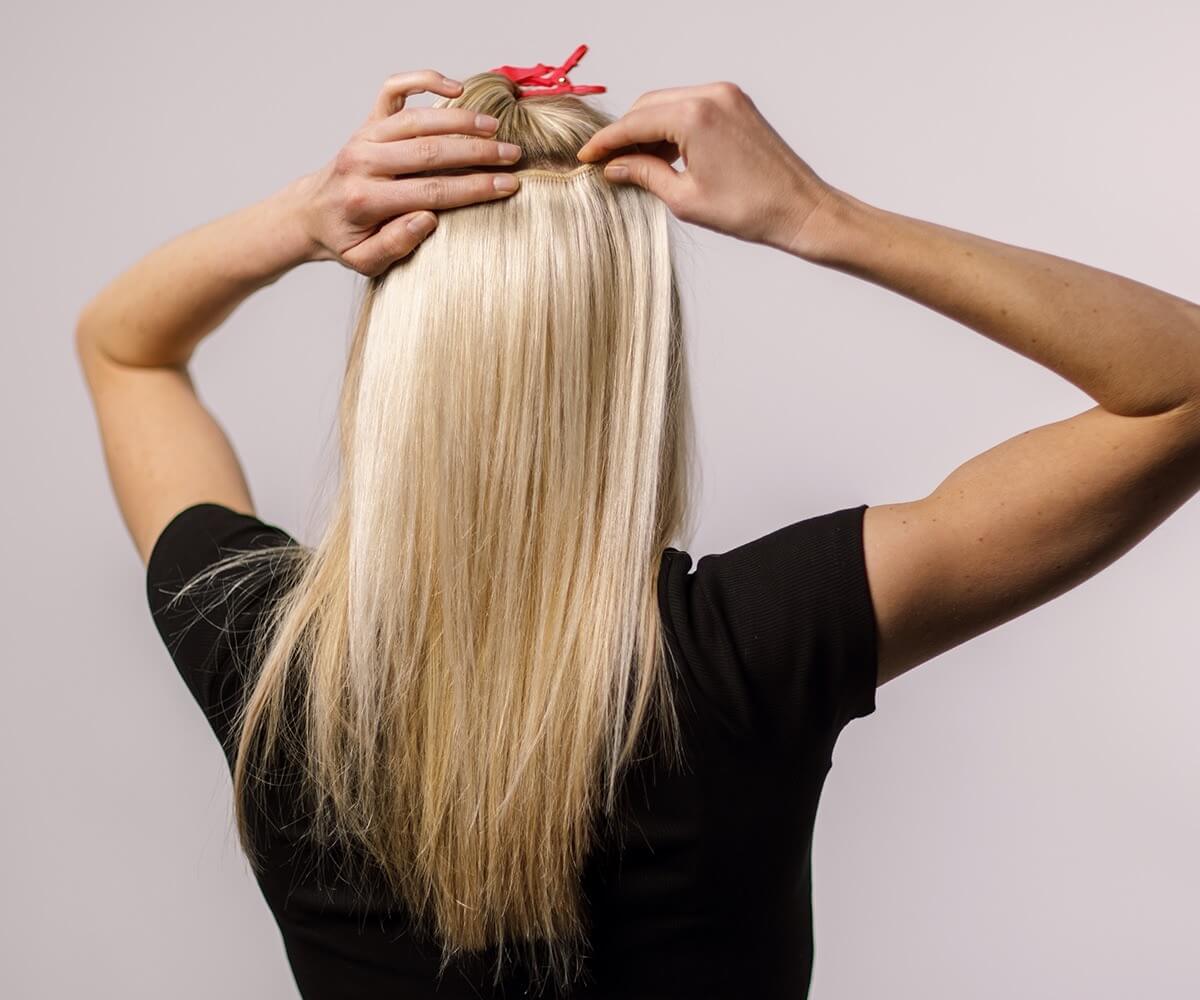
Step 2: Apply larger wefts in the back.
Start towards the nape of your neck and apply one of the large Clip-In wefts. Clips should sit about 1cm lower than where you part your hair. This allows for a more secure grip and helps the extensions lay flat so that they blend seamlessly. Clip the middle clip first, then the clips on each side.

Step 3: Work upwards as you stack the rows.
The next few wefts should be applied with about 1-1.5” between each hair parting. As you let a section of natural hair down for each weft, gently brush and detangle using an extensions brush. Then, as you did before, clip in a weft by securing it near the roots, clipping the middle clip, then the clips on each side.

Step 4: Apply wefts at the sides of your head.
Separate a section of hair on the right side, about 2" above your ear. Clip the rest of your hair out of the way. Install the 2-clip weft placing it at a slight angle. Repeat on the left side.

Step 5: Apply the smallest wefts at the parietal ridge.
Use the 1-clip wefts at the parietal ridge, the widest area of the head, starting at the temples and ending at the bottom of the crown. Apply at both the right and left sides of the head.

Step 6: Brush and style.
Let down any clipped up hair, then brush gently to create a seamless blend with your natural hair. Style and go!
Tips & Tricks for Using Clip-In Hair Extensions
Here are a few tips from our team of expert hair stylists on how to use your Donna Bella Hair® Clip-In extensions.
- Avoid clipping wefts at the top of your crown. Any clips applied higher than the ears may be hard to conceal.
- For an extra-secure hold, tease (back comb) your roots before securing each weft. This gives the clips more texture to hold onto.
- Some find it helpful to apply Clip-Ins not on the day of washing your hair, but the day after. You don’t want a lot of oil or product on your hair before installing Clip-Ins but a small amount of texture helps give the clips a more secure hold.
- Remember you don’t have to use all of the wefts if you don’t want to. If you have thin hair, you may want to opt for using less than a full pack in order to create a believable and seamless blend with your natural hair.
- A trick for seamless blending: straighten your own hair in with the extensions. Let everything cool for 5 minutes before adding curls or waves.
- Get the perfect color match. Match your Clip-Ins to the most prominent color of your hair. For more help color matching, consider ordering a swatch kit or contacting us for personalized assistance.
- To save time before you get ready, curl your extensions ahead of time. Pop them on and you’re ready to go!
- Keep an extensions brush in your purse. Brush & detangle often!
Fun Ways to Use Clip-Ins
Once you’ve practiced using Clip-Ins, you’ll love how easy it is to elevate any hairstyle with an added boost of length and volume. Here are some of our favorites:
- Create a gorgeous bun with an accent clip.
- Extend the length of a braid.
- Dress up a ponytail.
- Try highlights.
- Add layers to hair that’s all one length.
- Bring in a pop of color.
Want more ideas for how to style your Clip-Ins?
Caring for Your Clip-In Hair Extensions
Proper maintenance and care for your hair extensions will help keep them looking beautiful for longer.
Read the Ultimate Maintenance Guide
- Brush gently and brush often. Only use an extensions brush.
- Less is more when it comes to washing your Clip-Ins. We recommend only shampooing every 2-3 months. If you wear your extensions frequently, you may want to wash every month. Also if you have product buildup or your hair is very oily naturally, you may want to wash more often. Use only sulfate-free products.
- How to wash your Clip-Ins:
- Brush before washing.
- Rinse in cold water.
- Shampoo with a sulfate-free shampoo.
- Rinse completely, for about 2 minutes, ensuring all shampoo is out of the hair.
- Use conditioner or a deep conditioning treatment to help lock in moisture.
- Be sure to use heat protectant before curling. When possible, air dry your extensions. If you do use a hair dryer, use it on a low or medium temperature setting.
- Always store your extensions in a storage bag or on a hanger when not in use.