Your salon is a busy place, especially where hair extensions are concerned. The good news is—as with any art form—there’s a rhyme and reason to the process hidden in your hair extension tools. Efficient hair extension tools are vessels that:
- improve your task performance – as in the case of Keratin Bond Cutters, which produce more exact cuts on fusion bonds than generic scissors or hair cutting shears
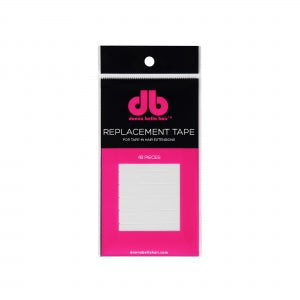
- make new functions possible – like how Replacement Tape introduced the prospect of reusing Tape-In hair extensions
- enable better rituals and routines – much like the Styrofoam Mannequin Head, which streamlines Tape-In removal and reinstallation
- do the legwork for you – for example, the Protector Strip determining your ideal sections so you don’t have to
- bolster your confidence and extend your skills – like the reliable Color Ring, which helps you to make informed color selections during consultations.
If your hair extension tools don’t do at least one of these things, then they’re not contributing to your salon’s efficiency. Here at Donna Bella, we make a point of introducing only those products that will have a measurable impact on the speed, ease, and accuracy of your hair extension process. We spoke with stylists Kayla Laumann (@kaylalaumann.hairdesign) and Linda Bangphonethip (@__linda_b) about how they use Donna Bella hair extension tools to cultivate a seamless salon practice, maximizing efficiency without compromising quality.
But first…
Why is it important to pursue efficiency in a salon environment?
While you might think that your works of art justify whatever amount of time and effort goes into making them, you can’t forget that your salon is not just a studio—it’s a business. As Kayla notes, “time is money”, and for that reason it’s a precious resource to be reinvested in your work, not recklessly wasted on tasks or steps that don’t add proportional value. On the other hand, both Kayla and Linda caution that hasty installations will only hurt you in the long run. “Rushed services are how mistakes are made,” warns Linda. In order to tread the narrow (but efficient) line between time indulgence and shoddy craftsmanship, you’ll need to establish a process.
If there’s one thing you should take away from this post, it’s that the key to maximizing efficiency in your salon is getting very clear on what it is that you’d like to achieve. Every tool has its designated area of influence, as well as its appropriate uses/techniques, so you’ll need to select the right tools to help you conquer each area of your extension practice. Kayla puts it this way: “Just like other parts of our industry, like foiling or cutting, we know you can’t just dive in without having a plan or ‘knowing where you’re going’. Extensions are the same. You have to be able to see the hair that’s currently there, have a vision for what the end goal is, and then have a plan for how you’re going to get there.”
Start devising your salon’s efficiency plan and collecting all the tools you’ll need to achieve it with our Efficiency Tools and resolution downloads.
From now until January 29, 2018, Donna Bella is offering 30% off of our most efficient tools, including: the Connector Belt, Stylist Tool Pocket, Hair Coloring Mat, Quick Pick Hair Parter, Strand Organizer and Strand Organizer Stand, Keratin Cleaning Kit, and Styrofoam Mannequin Head. We’re also providing downloadable resources like a 2018 Resolution Calendar and Appointment Pocket Guide. These hair extension tools are designed to trim excess time off of extension appointments, so you can make the most of every minute behind the chair.
Read through the line-up below to learn how Donna Bella Hair Extension Tools can help you attain greater efficiency in five distinct areas of your extension practice!
Related: How Much Do Your Tools Matter?
Selection, Coloring & Customization
The MVPs:
The technique:
Each of these products helps you to tailor your hair extension installation to the color and condition of your client’s hair (and to do so more quickly and accurately than ever).
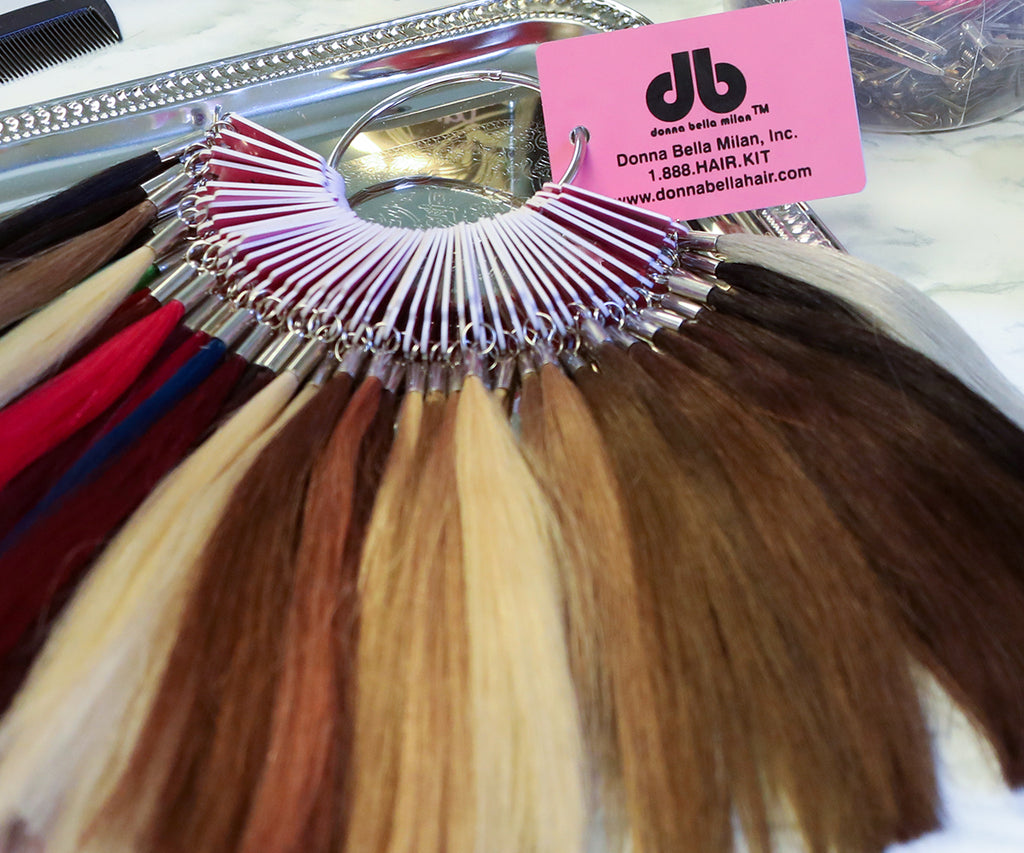
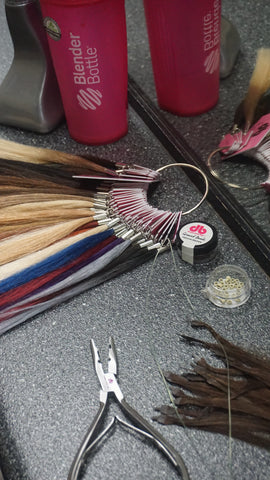
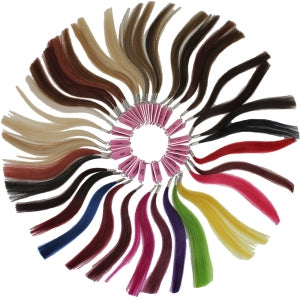
- Use the Color Ring to take the guesswork out of your initial color selection by simply laying a sampling of color swatches against the client’s hair. Compare and contrast the relative tones against the natural hair (ideally in several different lighting conditions), then select the one that matches most closely for your installation.
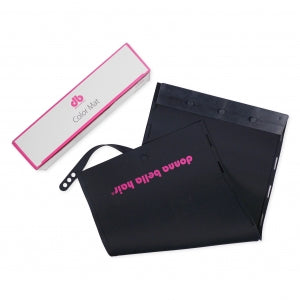
- If the extensions need to be customized to bring them to the perfect shade, pull out the Hair Coloring Mat to manually and securely apply mixed color. All you have to do is clip a pack of extensions to the mat itself, then brush on your color formula, moving in the same direction as the cuticle.
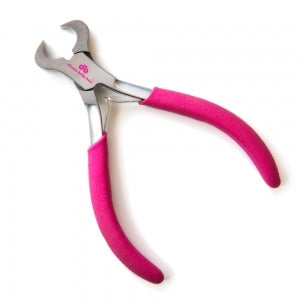
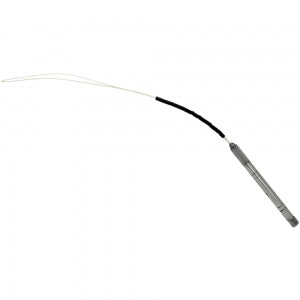
- Finally, for Kera-Link installations, if your perfectly selected and colored hair extensions need to be tailored to the texture or thickness of your client’s hair, rest assured that the Keratin Bond Cutters can do that for you in a pinch. Cut quickly through fusion bonds vertically, horizontally, or even diagonally (if you wish), with nothing more than a slight squeeze of your hand. To watch the Keratin Bond Cutters in action, check out this video.
Pro Tip
“Blondes are usually hard to match!” muses Linda. “I’ll always order 2 different blondes to make sure they blend!”
Related: All the Tools You Need for a Successful Color Job
Set-Up
The MVPs:
- Strand Organizer
- Strand Organizer Stand
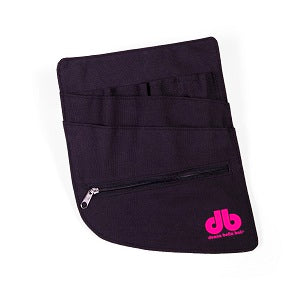
- Stylist Tool Pocket
- Connector Belt (for Kera-Link installations)
- Loop Tool (for I-Link and Flat-Tip installations)

The technique:
Setting up your work area before an installation is key to keeping the whole affair running smoothly. For Kayla, this involves a precise layout that she uses for every extension appointment. “I have two carts to my right, one with the bundles of hair lined up, and the other with my Melting Connector, Protector Discs, Velcro Hair Grippers, rat tail comb, and two Duck Bill Clips. Having this system helps me to quickly move along because I look to my right for a split second and I’m able to reach exactly what I need.” Linda also uses a standard layout for her installations, featuring a starring cast of go-to tools. “I always have my Strand Organizer, my Classic Tool and the Keratin Bond Cutters present. I do a lot of Kera-Links so those are essential!”


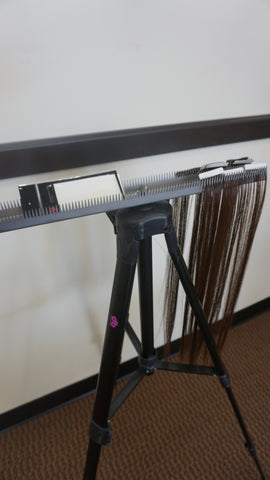
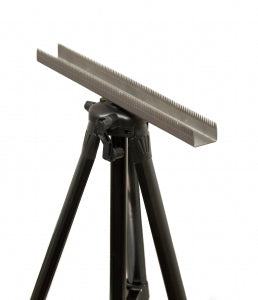
The Strand Organizer is a popular option for efficiency-minded stylists looking to shave time and stress off of their installations. “I love my Strand Organizer!” Linda chimes. “It keeps my extensions neat and organized! Very helpful!” Kayla agrees. “We currently have the Strand Organizer on order and I can’t even wait to try it! Currently what slows me down the most if I don’t have an assistant passing me the strands, is trying to pull one strand from the bundle and a few other strands deciding they want to come along for the ride.”
- To use the Strand Organizer, just clamp it to your work table or position it on the Strand Organizer Stand and thread your hair extension bundles through the “teeth”.
- Pair the Strand Organizer with other convenient tools like the Stylist Tool Pocket or Connector Belt so you can carry all your must-have items with you as you work!
- For I-Link and Flat-Tip extension makeovers, pre-load the Loop Tool with a full set of beads to spare yourself the hassle of stringing beads during the installation.

Pro Tip
Linda shares that, “When I have an extension service, I try to make sure they are my last appointment. This ensures enough time so I am not rushed. I usually prep the extensions the day before. Organize them in my Strand Organizer, and cut the bonds in half--especially if the guest has super fine hair. This makes everything run smoother on day of service.”
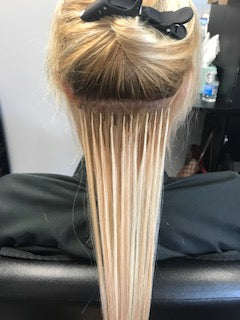
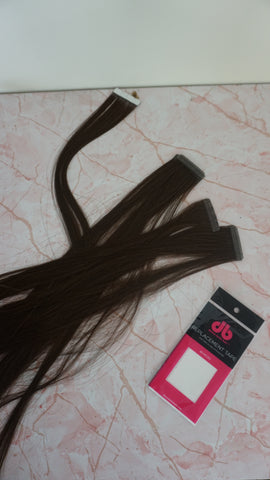
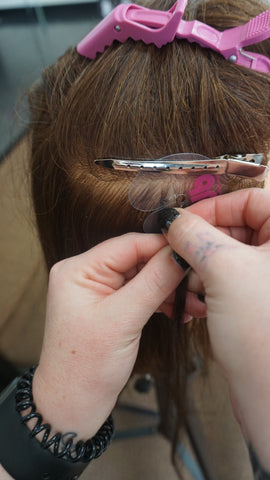
Linda prepared these customized Kera-Link strands beforehand by cutting them in half with Keratin Bond Cutters to suit the client’s fine hair.
Installation
The MVPs:
- Quick Pick Hair Parter
- Velcro Hair Grippers
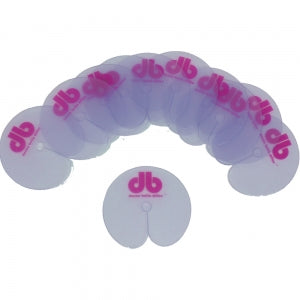
- Protector Strip/Protector Disks (for Kera-Link installations)


The technique:
Your collection of go-to hair extension tools will often depend on which method you’re working with. Linda, for example, keeps her Classic Tool and Melting Connector on hand for her many Kera-Link appointments. Still, there are many hair extension tools that can be used for various types of hair extensions, including those used to facilitate parting.
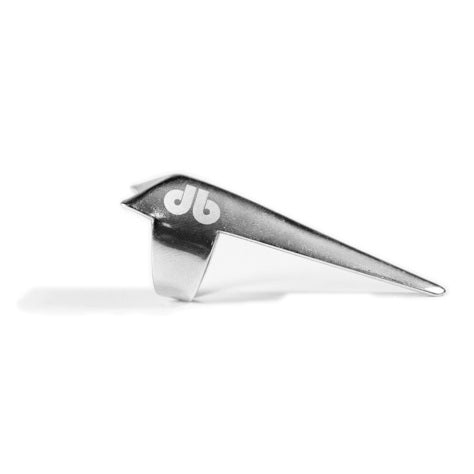
- The Quick Pick Hair Parter can be worn on any finger, and it allows you to effortlessly part your client’s hair with just the sweep of your hand. Watch this video to learn more about how to use the Quick Pick Hair Parter.
- The Velcro Hair Grippers keep your part lines perfectly clean by holding down any flyaways. “The Velcro Grippers are a gem!” enthuses Kayla. “I am a stickler for clean sections, and a clean application is the first determining factor in the longevity of the client’s extensions.” To use, simply smooth down the hair to either side of your client’s part and apply the Velcro Hair Gripper overtop, a couple of centimeters from the part.
- Once your part is established, you can apply a Protector Strip or series of Protector Disks along the part line to pre-section the hair for installation. Do this by clipping the strip/disk on either side, then threading just enough natural hair through the hole to comfortably fit within it (this is designed to be the precise amount to match the extension strand itself!). This step is particularly vital for Kera-Link installations, as the strip/disks will protect the natural hair from keratin residue.

Pro Tip:
“As my extension clientele grew I learned the importance of a cutting chair,” recalls Kayla. “If I had two sets of extensions one after the next, my neck and back at the end of the day would certainly feel it. The chair allowed me to sit up straight, alleviated my neck from being down all day, and of course gave my hips a break from standing.” Another benefit of the cutting chair? “It allowed me to be completely eye level with the row of extensions I’m working on. Keeping my sections even cleaner!” Kayla finds that, “When I am sitting and comfortable I am able to move at a much faster pace because I’m not trying to reposition myself or be in my head about how much my feet ache. Anything that saves our body in this industry is worth its weight in gold.”
Removal & Reinstallation
The MVPs:
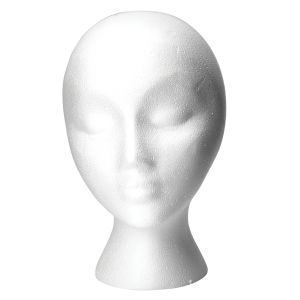
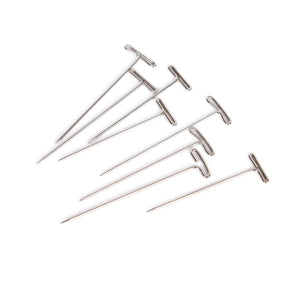
- Styrofoam Mannequin Head and T-Pins (for Tape-In reinstallations)
- Replacement Tape (for Tape-In reinstallations)
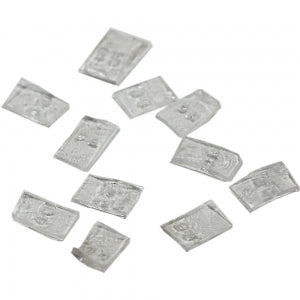
- Rebonds (for Kera-Link reinstallations)
The technique:
When it comes to Replacement Tape and Rebonds, efficiency means not needing to waste hair extensions after a single use. Rather than determine the lifespan of an extension by the health of the bond, you can replace the bond to your heart’s content until the hair itself begins to deteriorate--or until the strand becomes too short, in the case of Kera-Link move-ups.
- After removing a Tape-In weft with Tape-In Bond Remover, clarifying it with Cream Cleanse Shampoo, and leaving it to dry, apply one strip of Replacement Tape to each weft, lining it up exactly on the bumpy/rough-textured side.
- Once a Kera-Link extension has been removed from the hair using Keratin Bond Remover and the Classic or Luxe tool, cut off the tip of the extension (where the bond has been broken). Then, place a single Rebond on the indented section of the Melting Connector, hold the Kera-Link strand up to the client’s hair strand, and melt the rebond around both. Use your fingers to roll the new keratin bond fully closed, just like in a first-time Kera-Link installation.
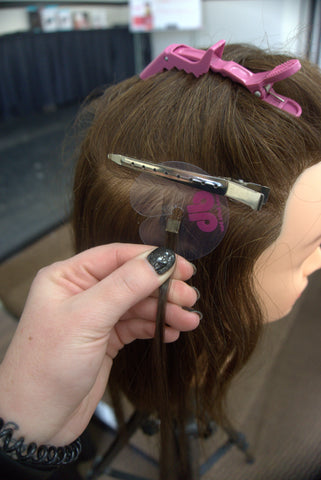

The Styrofoam Mannequin Head and T-Pins revolutionized what is otherwise a laborious Tape-In reinstallation process by keeping wefts organized during the cleaning and rebonding process, thereby eliminating the need to re-blend the hair.
- As you remove wefts from the client’s hair, pin them to the corresponding section of the Styrofoam Mannequin Head with a single T-Pin, so you know where to re-install that weft later.
Pro tip:
Use the Styrofoam Mannequin Head to keep hair extensions tidy overnight, as it’s good to give your client’s hair a break between rounds of extension wear.
Upkeep
The MVP:
- Keratin Cleaning Kit (for Kera-Link tool maintenance)
- Microfiber Cloth

The technique:
Just like hair extensions, hair extension tools need a bit of upkeep in order to keep them working as perfectly and efficiently as possible. For Kera-Link tools, this calls for the Keratin Cleaning Kit.
- Spritz some Keratin Cleaning Solution onto the Microfiber Cloth and rub over your Protector Strips, Disks, Melting Connector, and Classic/Luxe tool to remove any dried keratin residue. Finish off by washing the solution away with soap and water.
Pro tip:
Make sure your Melting Connector is turned off and sufficiently cool before attempting to clean it! Don’t clean your hair extension tools immediately following an installation.
________________________________
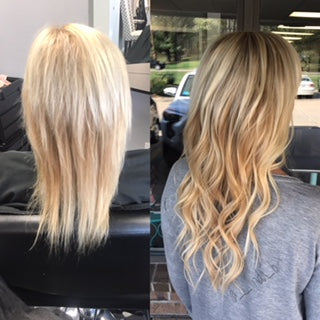
Many thanks to Kayla and Linda for sharing their insights! To learn more about their salon practice and see their beautiful hair extension transformations, visit their Instagram pages and websites today!
Kayla Laumann
@kaylalaumann.hairdesign
Linda Bangphonethip
@__linda_b
Hair By Linda